How to make a cemetery fence prop, spooky haunted house gate, or iron fence for Halloween displays
It’s really quick and easy to make a great looking wrought iron fence for a Halloween display, graveyard decorations, haunted house or just as a great spooky decoration for indoors or outdoors. You can customize this in many ways and leave out the fence posts, but here’s what it could look like:
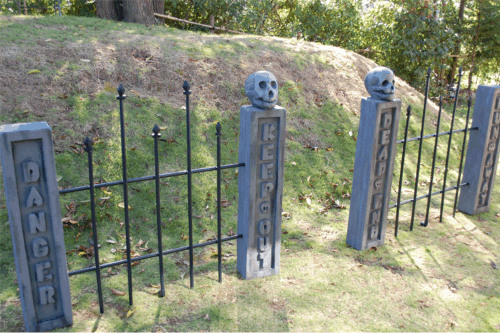
The project costs about $10/fence post and $10/fence section. (In the picture there are 4 fence posts and 2 fence sections.)
What you need/could use: for one fence section
- – 3.5 black PVC pipes (2m in length)
- – thin black wire
- – small piece of foam for the fence tops (scraps will work)
- – black paint (for the fence toppers)
(for how to make spooky fence posts, see the next post.)
How to make a graveyard fence:
Cut you PVC pipes into the height you want. I used 100cm and 80cm for my fence height and 90cm for my width. You need 2 large posts (100cm), 3 small posts (80cm) and two crossing rods (90cm.) Your width, height and arrangement can vary, depending on what you want.
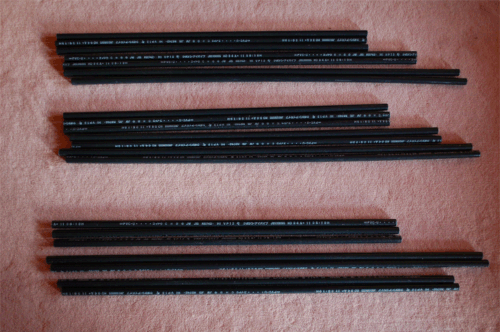
The picture above shows enough pipes for 3 sections.
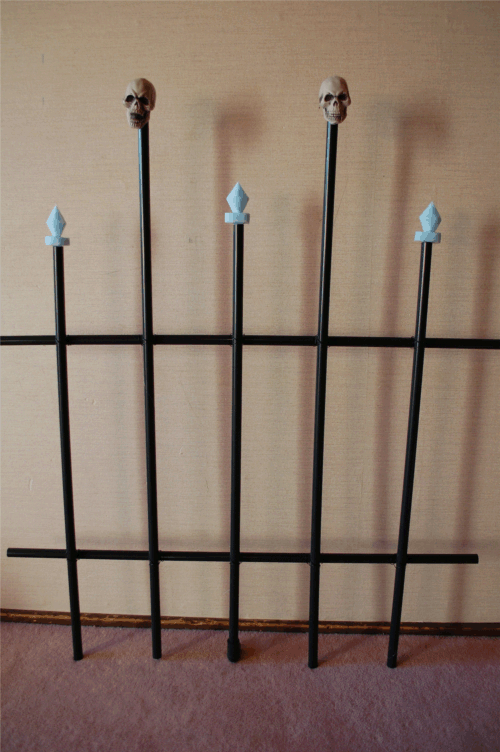
Lay out you pipes on the floor and decide on your spacing. Using about 40cm of your black wire, fasten the poles together at the joints. I did the middle post first and then the outside posts. Once all of the posts are fastened, stand your rickety old fence up and adjust so that the posts are all touching the ground and use a wall to make sure your crossing bars are also lined up. It is good to stand back and take a look at the fence. If it looks good, use that as your guide of height and width on subsequent sections. (I used a hot glue gun in all of the joints to add some stability.) This takes about 15 minutes for each section.
Your fence is basically done, all we need to do now is add some accessories to sell the effect.
Fence toppers for a rot-iron cemetery fence prop:
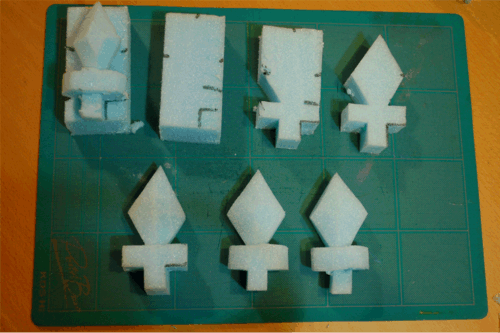
Using a bit of foam scraps I had, I cut up a spear top to put on the fence. I left a small piece jutting out to stick into the pipes and make applying these easier. After I made one that I liked, I used it as a template for all of the others. See pictures below:
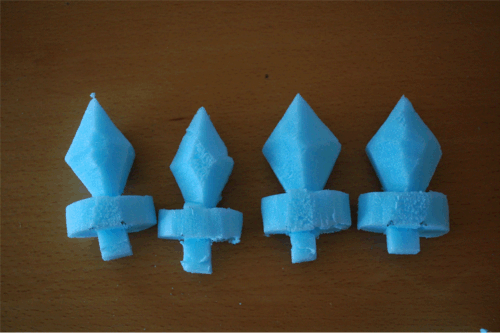
Place your piece on another piece of foam and mark where you need to make cuts. This doesn’t have to be exact, because it is an old fence and these really should just complete the look, not really draw attention to themselves.
Here’s a step by step picture of how to make these fence toppers:
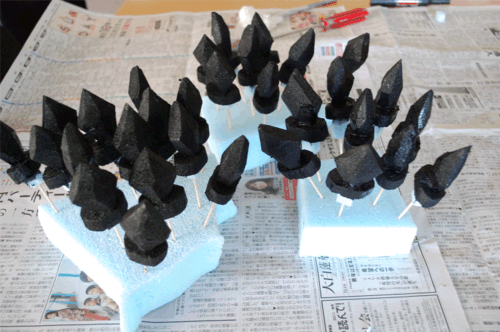
Then paint them black. I used tooth picks to place them into another foam piece while they dried. It was just easier.
When the top pieces are dry, stick them onto the tops of the pipes and you are done! Making the toppers takes about 40 minutes for 10 pieces, which includes cutting them out and painting them.
Once your fence is put together you can stake it down outside or use some PVC L joints on the bottom and stand it up inside or on your front porch.
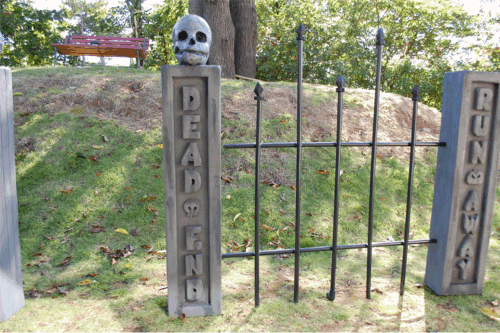
You can experiment with different tops, like the picture above. For my Haunted House display, I will use a couple small skulls on the center two pieces. Check out the next thread for how to make the cemetery fence posts. You can also add a spooky tree prop to your display as well.
October 5th, 2011 at 2:34 am
[…] (To make the fence sections, see the posts on how to make a cemetery fence.) […]
October 12th, 2012 at 1:03 am
Love this idea, it is exactly what I want and wow…..gonna be much cheaper to make myself than to buy….
Thank you
Sandy
September 18th, 2013 at 1:49 am
Nice tutorial! Just to let you know-it’s wrought iron, not rot iron. It refers to the way the iron was formed, as I understand it.
September 18th, 2013 at 8:30 am
Stephanie – Thanks and I’m glad that you like the tutorial. I’ve fixed the mistake and if you find any others please let me know.
October 27th, 2013 at 1:18 am
This was an awesome project! Would love to share my pics with you-I get tons of compliments. I plan to build your trees next year
October 29th, 2013 at 12:49 pm
Thanks for the feedback and I’m glad to hear that it went over well. Please email me the pictures, I’d love to see them. printablecards@yahoo.com
September 15th, 2014 at 7:41 pm
I Love this! Any suggestions for making the fence sections bend and curve to follow the edge of our flower beds? Thank you
September 16th, 2014 at 12:12 am
Tiffany – It all depends on how long your flower beds are. A long bend is easier than a short quick turn. Check your home improvement store. There are joint pieces for PVC pipes. Here we have 45 degree joints and we might have 30 degree as well. You won’t get them to bend/curve, but you can add those joint pieces and small connectors to get some ‘turn’ in the fence.
I hope it works out.
October 5th, 2016 at 3:38 pm
About how long is the completed project? Trying to figure out how many I’ll need for my yard. Thanks! Great work!
October 13th, 2016 at 9:00 am
Kelsey – Each segment is really up to you. Mine are 90cm long (about 3ft.) That seemed good enough for me and in the end gave the fence nice balance.
I have 6 fence segments in all (and 6 posts.)
October 19th, 2016 at 12:15 am
Love this project!! I’m trying to figure out what the string is for and how you got the horizontal pieces attached to the vertical pieces? You mention joints but I don’t actually see any in the photos and didn’t see them on the supply list.
Thanks so much
November 2nd, 2016 at 12:58 am
sorry, I don’t have and actual joint picture close up. Not really joints either, I probably should edit that to say cross sections.
I used the thin black wire and just wrapped it around a couple times. You can twist where you tie the wire off with pliers to get it tighter. I think I also went back and put a little hot glue on them as well.