Make your own Treasure Chest – Pirate party prop
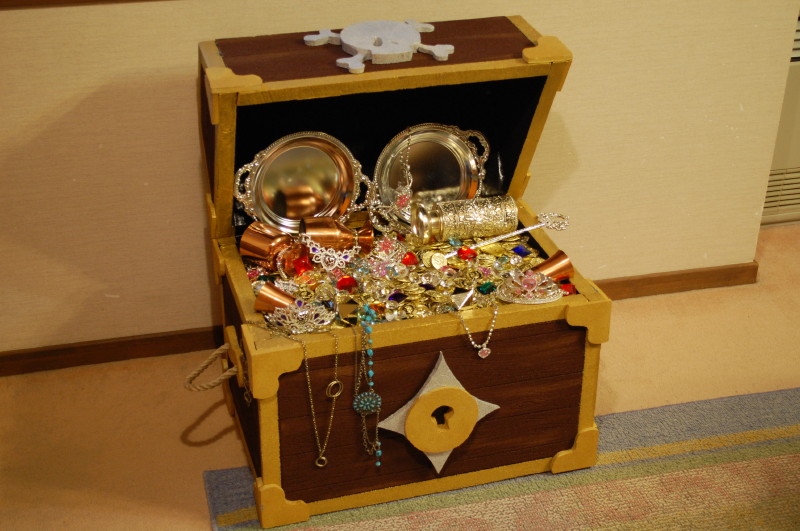
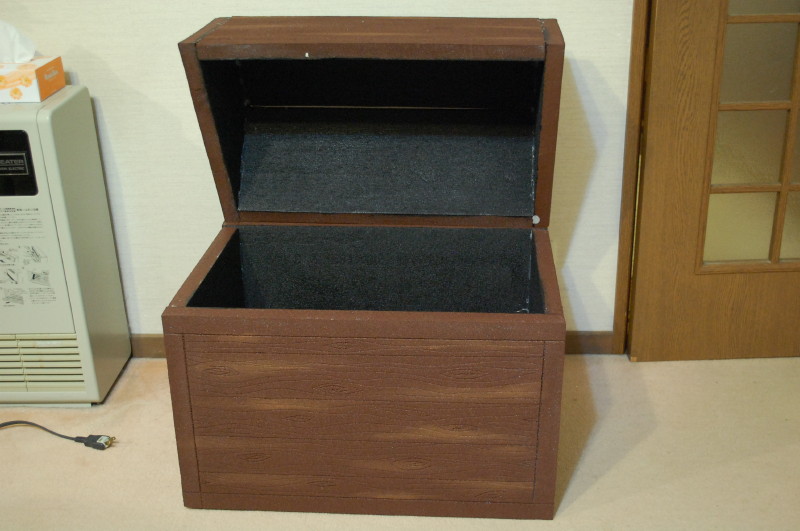
Make your own treasure chest for a pirate theme birthday party or pirate theme Halloween party. Below is a picture of the chest I made. You’ll also find progress photos and an explanation on how to make a pirate treasure chest. The project took about 3 hours in all.

Recommended Materials:
– 1 styrofoam insulation sheet, 180cmx90cmx30cm (about $12)
– brown water based paint – medium sized container (about $6)
– gold water based paint – small (about $6)
– a box knife
– hot glue gun (wood glue will also work)
– 1 large and 1 small paint brush
– masking tape (optional)
– scraps of rope for handles (optional)
Step One: make a plan
I like to draw out a little paper plan for any halloween party prop. It’s important to have a clear image of what your treasure chest will look like as we move forward. Below, are my two rough sketches. You can use them as a guide if you’d like.
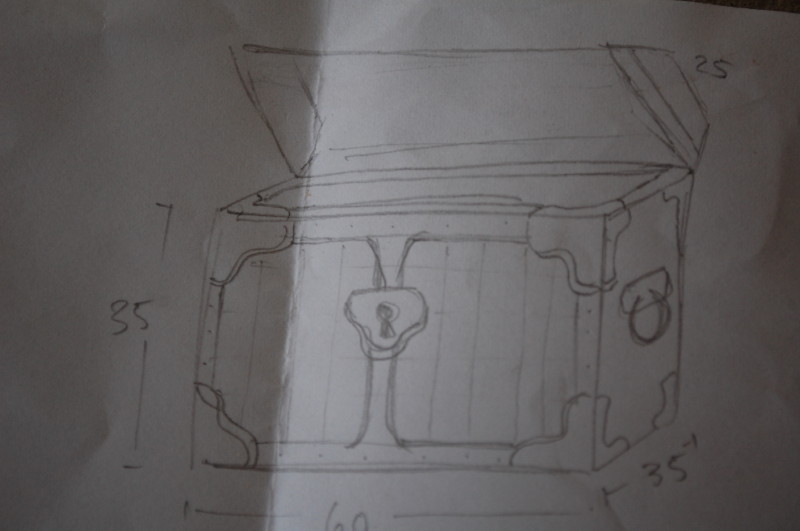

It’s much easier to make an angled treasure chest lid rather than a round lid. The lid is the hardest part in my opinion.
I also used the paper design to decide how big I wanted the chest to be. Mine is 35cm high, 60 cm wide, and 35cm deep. This is important for measuring and cutting out the boards in the next step.
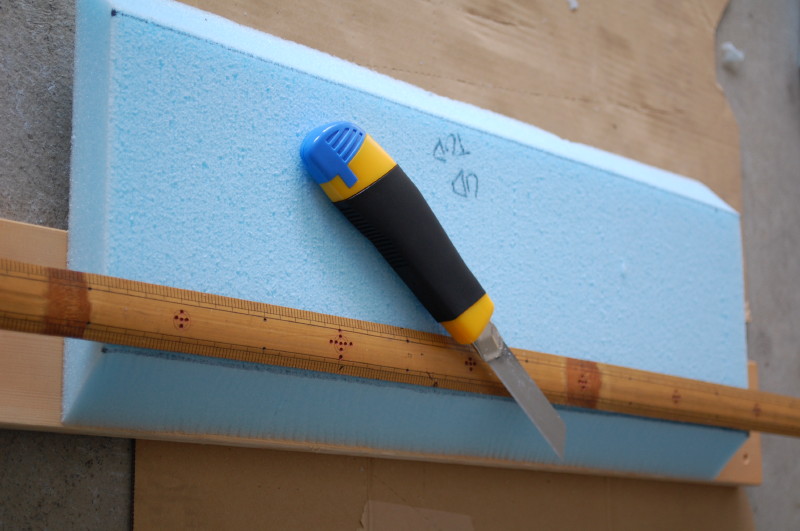
Step 2: Cut up your boards
Using a yard stick or tape measure, draw the cut lines on the foam boards. I used a spare 2×4 as a guide to help keep my cuts at a right angle. This is important when putting the treasure chest together. If your cuts are square, the pieces will fit together nicely.

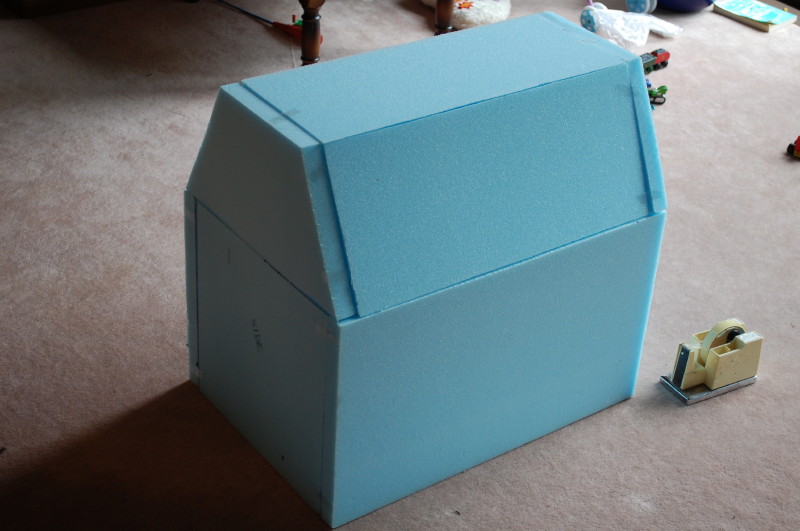
For the lid, I cut the side pieces first. The bottom was 35cm deep and the top of the lid was smaller, 20cm. Then you need to decide how tall you want your lid to be. Mine was equal to the top depth, 20cm. Now, once you have your side pieces, you’ll be able to measure how wide the front, top, and back lid pieces need to be.
To get the lid pieces to meet properly, you’ll need to cut the edges at an angle. I placed my front piece even with the side piece. Then you can see how much needs to be cut so that your lid will meet flush with the box. Using a yard stick and 2×4 to keep my knife steady, I cut the angles for the lid. You can see that in the second picture just above. (If the pieces don’t meet perfectly, don’t worry. Your treasure chest is old and boards warp. It may make your chest look more like an authentic pirate treasure chest.)
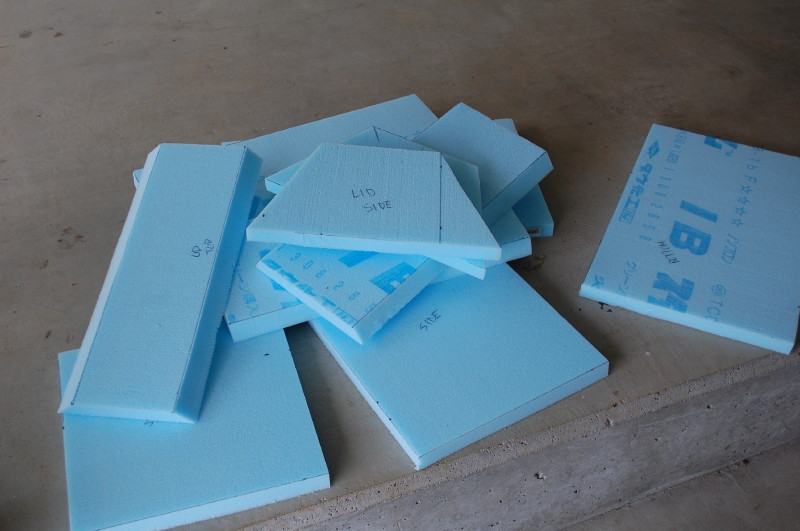
Be sure to label your pieces as you see in the third picture above. And, if you’d like, you can loosely construct your treasure box to make sure all the pieces go together.
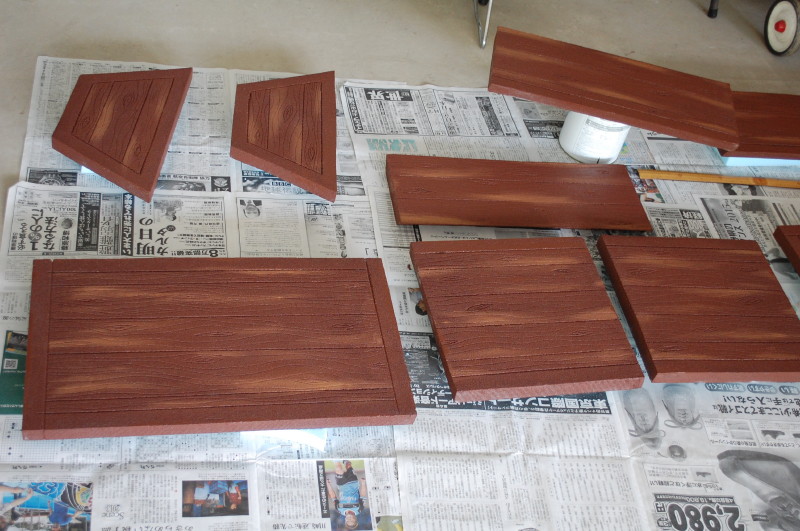
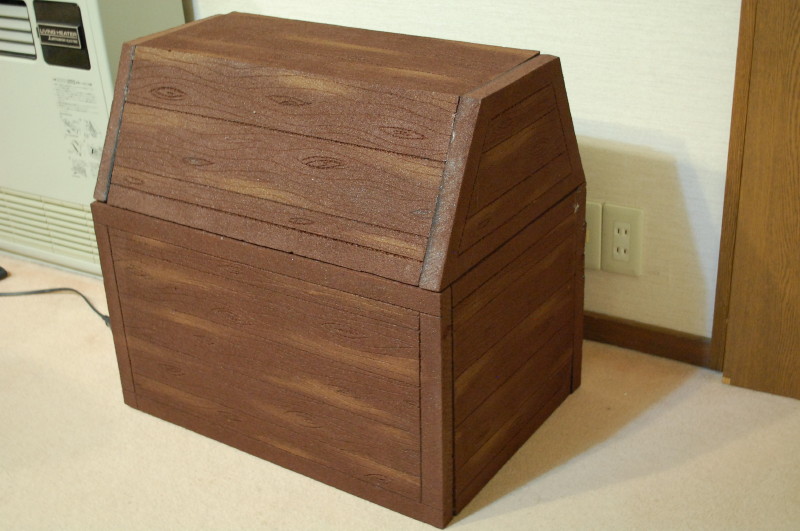
Step 3: add wood grain and paint
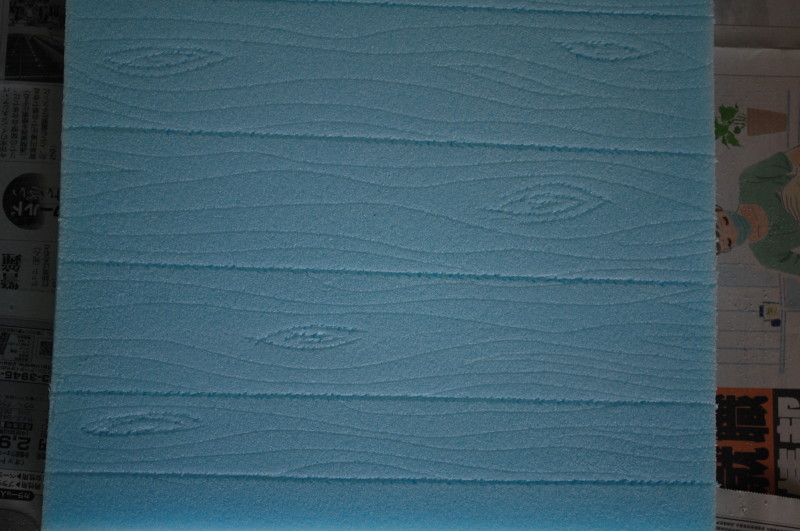
I used a flat head screw driver and ran the screw driver down the board lightly to make the wood grain. First, I made separations between the boards. I ran the screw driver down the boards several times, pressing harder and hard each time to get a deeper groove. Then, pressing lightly, I made some little knots here and there. After that you just need to make some grain lines all the way down the “boards” going around your knots.
Then, paint your boards any desired shade of brown. I believe I used ‘oak’. I used a lighter brown to give the boards a more realistic look, but that will mean buying another shade of brown paint. The effect is awesome, but it’s not necessary.
Do not use spray paint! The aerosols in the spray paint will eat your foam and you’ll be starting over.
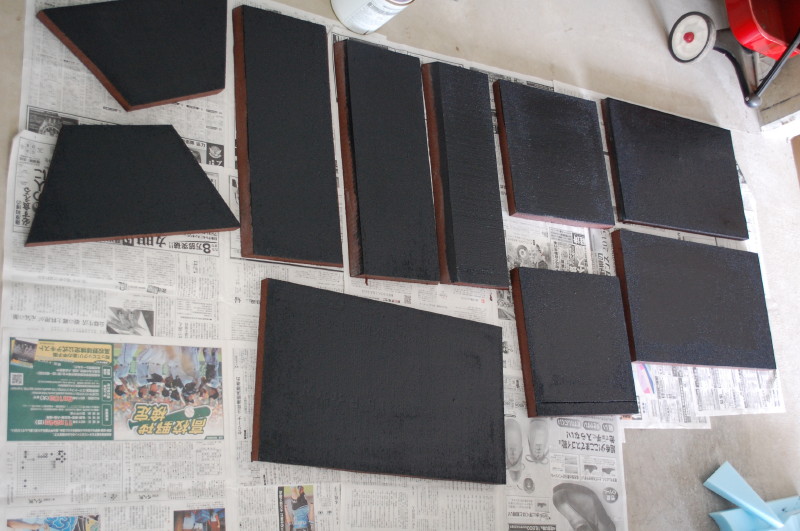
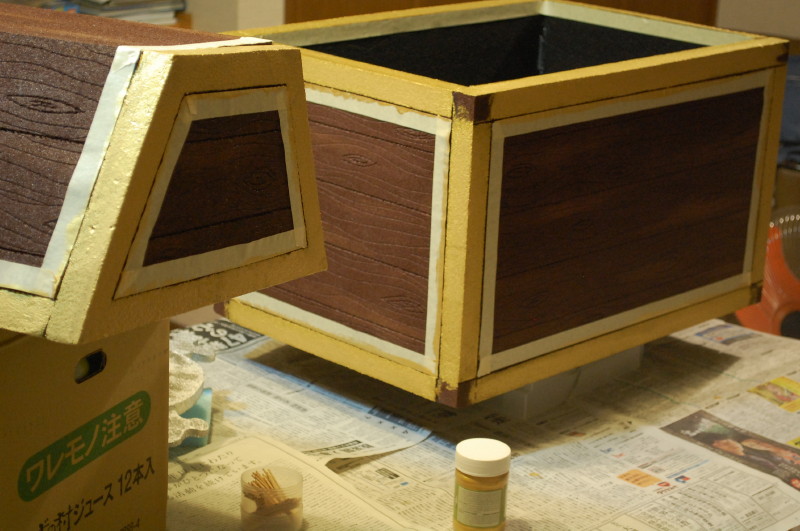
Once the front dried, I painted the inside black. Again, not really a necessary step, but I happened to have black paint and I’m a little particular.
Step 4: glue your chest together
Using a hot glue gun, assemble your pieces. A hot-glue gun works great because it will dry in a few seconds, allowing you to assemble the whole thing in 10 minutes or so. (You can use wood glue but it may take a day for each glued section to dry.)
I had to wait for gold paint to arrive, so I added the gold trim after assembling the treasure box, but you could paint the trim before assembling.
Step 5: treasure chest accessories
I added some corner pieces, a lock, skull and cross bones, handles, and of course, treasure to the chest. I don’t have individual pictures for each of these, but you can see them here in the finished shot.
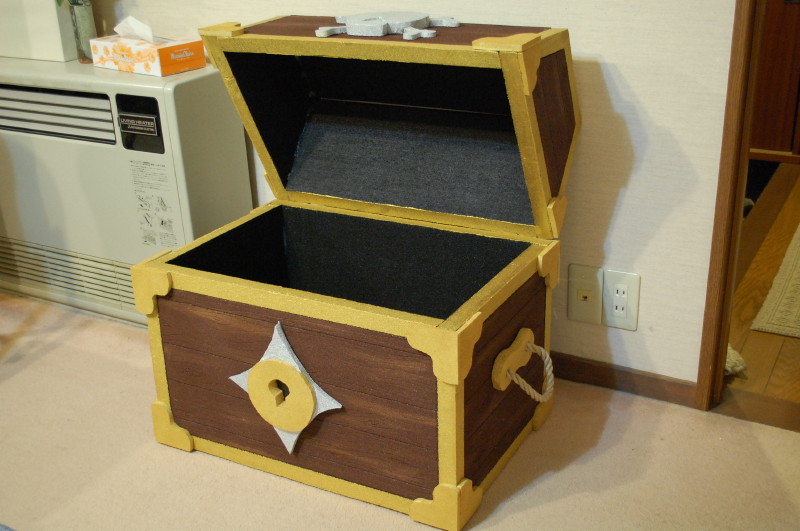
All of the final pieces will help make your pirate treasure box look a little more, well … pirate-y. I used the extra pieces from the original foam board. I free handed each piece using a magic marker, cut and then painted them. Again, using the hot-glue gun, I affixed the pieces to the chest.
For the treasure, you can use any assortment of plastic gems, gold coins, toy necklaces, and I added some large plates and goblets.
That’s all there is to it! It was much easier and quicker than I had originally thought. And, I think it turned out pretty good. If you decide to make a pirate treasure chest for a pirate theme birthday party, pirate room decoration, or for a pirate theme Halloween party, please let me know. I’d love to see pictures or just hear how it went!