Spooky Tree prop or decoration | how to make a creepy tree or spooky Halloween tree
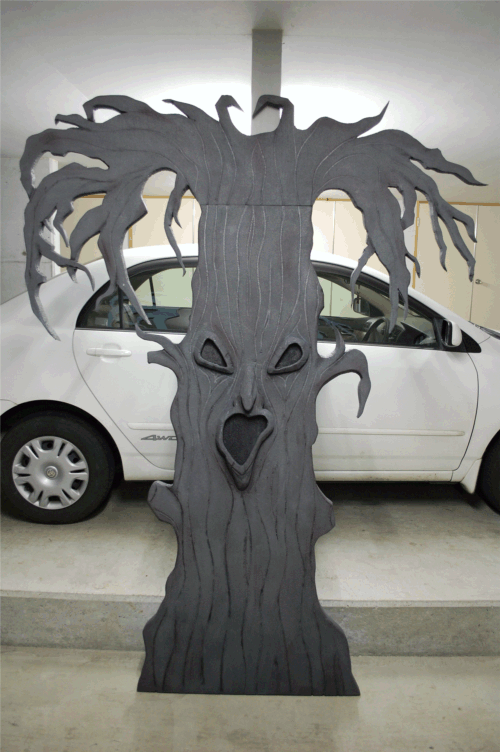
Making your own props for a play, Halloween display, haunted house, Halloween party or other event can save you a lot of money and you’ll get exactly what you want. It saves you time shopping around as well. Here’s how I made the spooky tree this year for my Halloween Haunted House display:
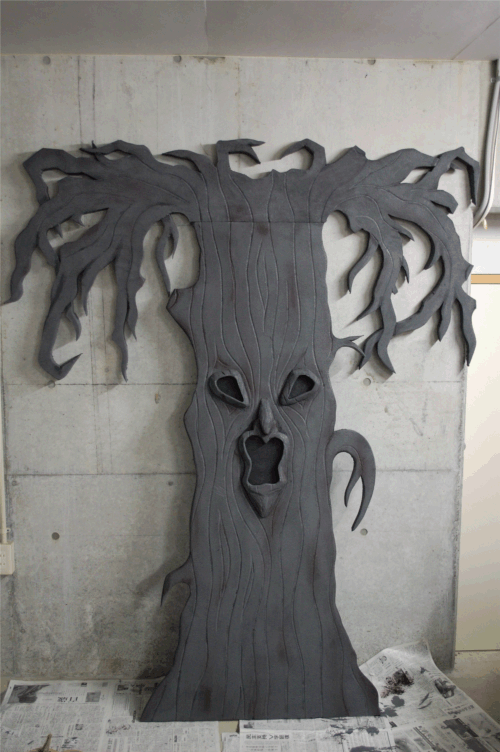
time: about 3 hours in all (more or less depending on how far you want to go with this)
materials needed:
- – base: foam insulation boards, card board, or wood boards
- – a box cutter/box knife
- – a medium sized paint brush
- – water based house paint – gray and black
- – sand paper
- – 1 magic marker
I like to use foam insulation boards. You can find these at most DIY stores and home centers. The foam boards are light for moving around. They also are easy to cut out, sculpt and sand down. They are also sturdier than cardboard. If you want to use cardboard, that will work, too. Follow the same steps below. You may want to add some support behind the cardboard for stability. You can also add paper-mache for more texture and a tree like feel.
cost: varies depending on material and actual size, but $20-40
Steps involved and pictures of the process:
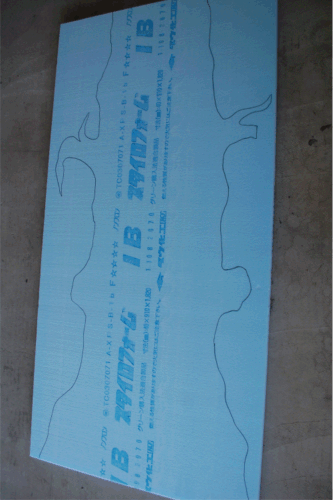
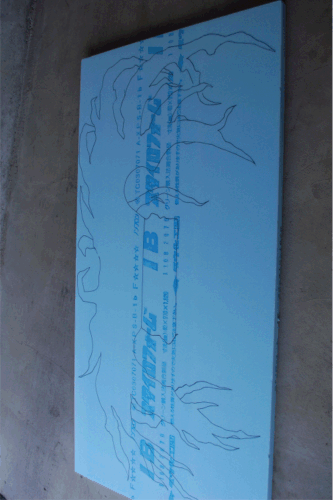
Step one: spooky tree design and template, draw the tree shape and cut it out.
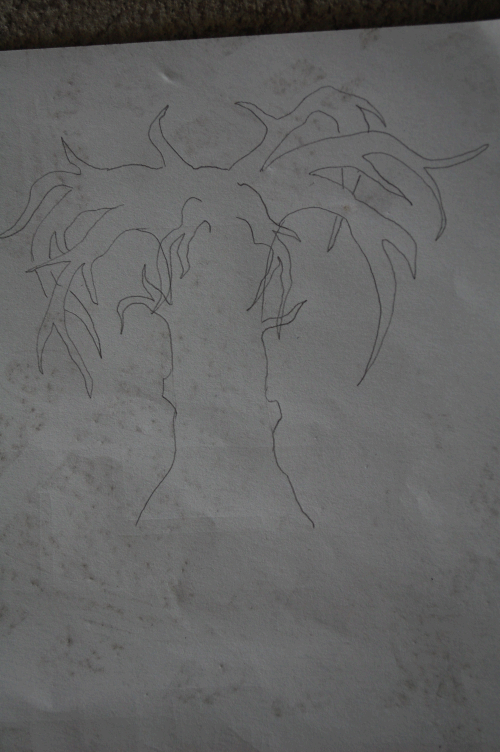
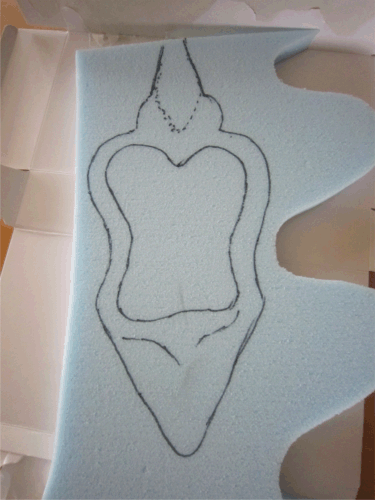
Having an idea of what your tree will look like is important. You can use my tree template drawing or make your own. Here are some more spooky tree images you can use as a reference.
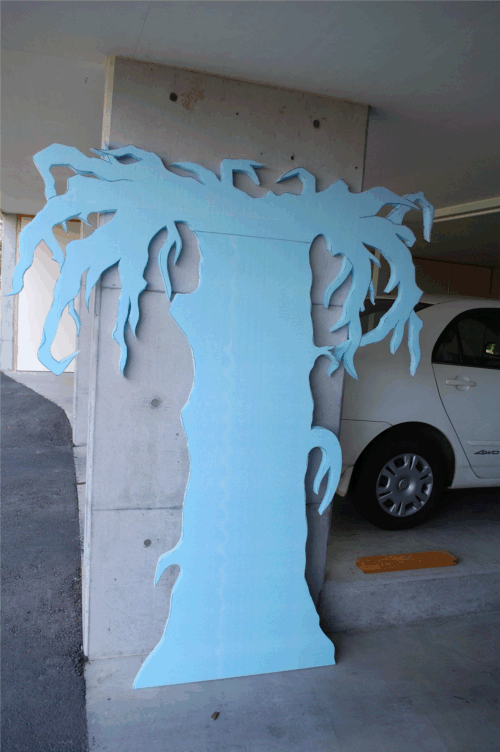
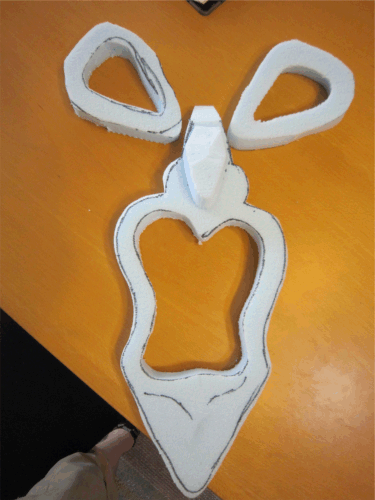
When you are drawing these on your base, you can just freehand everything. The more messed up and wonky the tree is the better. For the tree trunk just remember that the bottom should be a little wider than the top. For the tree top and limbs, I found that making them appear to cross at points looks a little better than just drawing out a bunch of single branches. Also, having them cross creates a stronger and more stable configuration. See the picture above for a better idea of what I’m talking about. Below are my two pieces cut out and placed together. This is an easy way to just make a spooky tree silhouette.
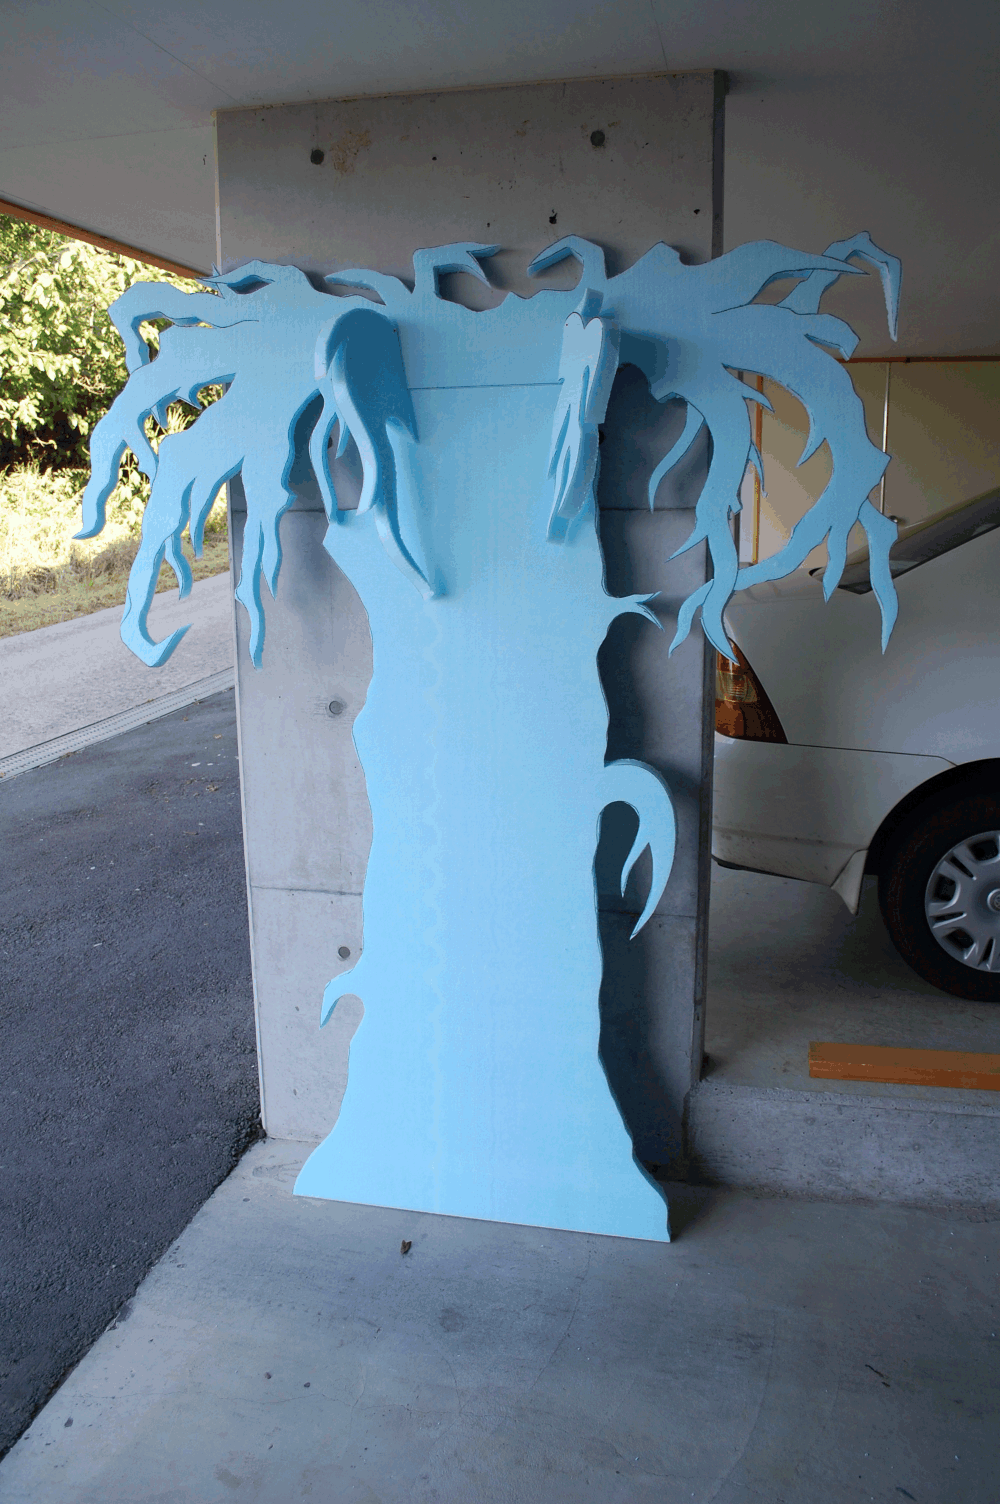
(the second pictures has some pieces coming out to make a 3-D spooky tree. It’s just another option and a way to use any extra materials.) Using 2 pieces means the top can really branch out and hang down. You can certainly do this in just one piece, but you might find you need to either give up height or width.
Step 2: add shape, a face (if you want), and texture to the tree
After everything is cut, you should sand the tree down to make the edges smooth. You can add more small pieces or paper-mache all over the tree to make it bumpy, but I didn’t do that.
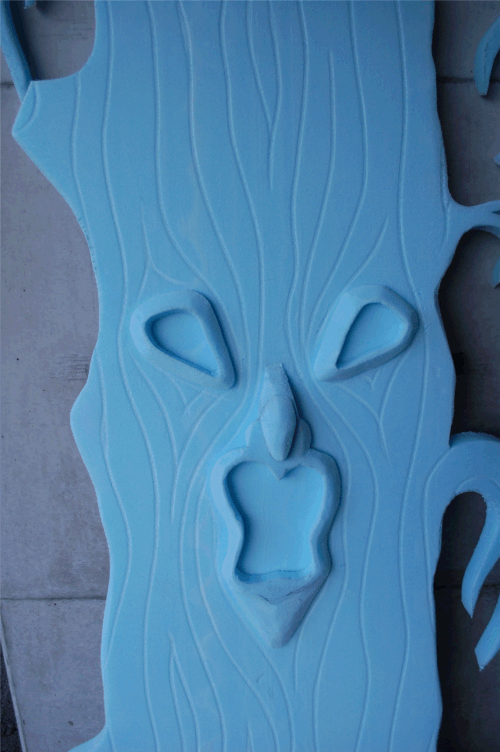
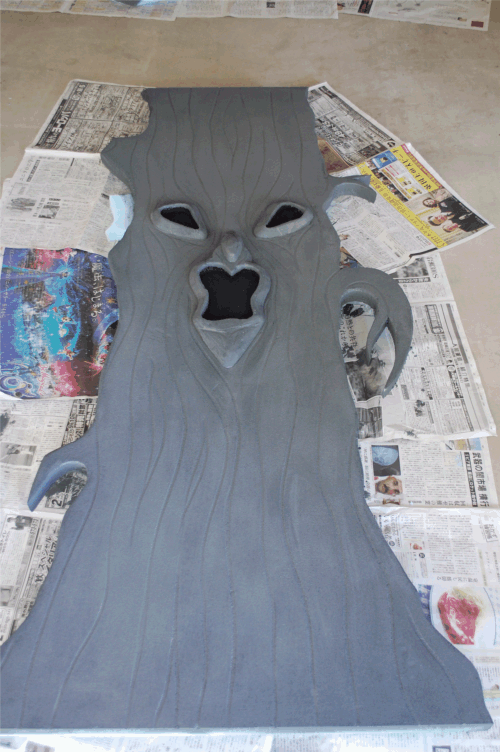
To add texture to the tree, I used the top of the handle on my paint brush. Again, this doesn’t require any set rules. I just drew lines down the tree and made them move around any objects like the face or anything else you add. I ran the handle down the boards pushing in slightly. If you are using cardboard or wood, you can add these later with black paint.
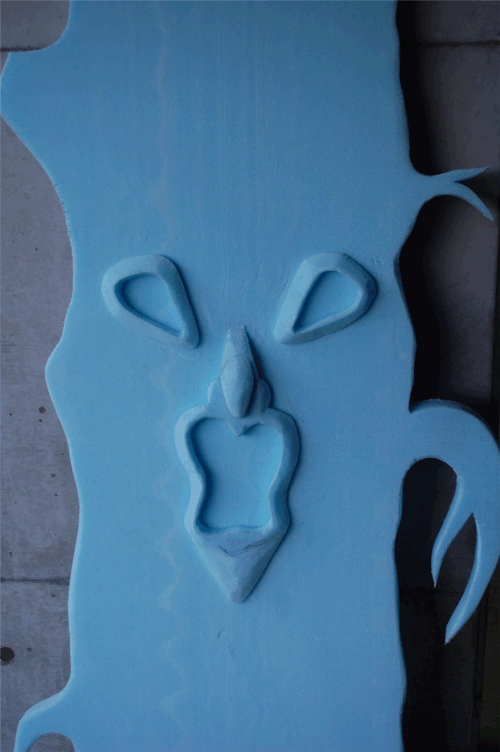
If you want a face, here’s what I did. I first drew a design onto my foam board. Adding a face by gluing it on gives depth and means less sculpting and shaping with out base. Then I cut that out and glued it onto the base with wood glue, but any glue will do, or hot glue gun. Then I cut off the sides at an angle to make it appear that the face was coming out of the tree, rather than just sitting on it. See images below and above.
Step 3: paint your tree
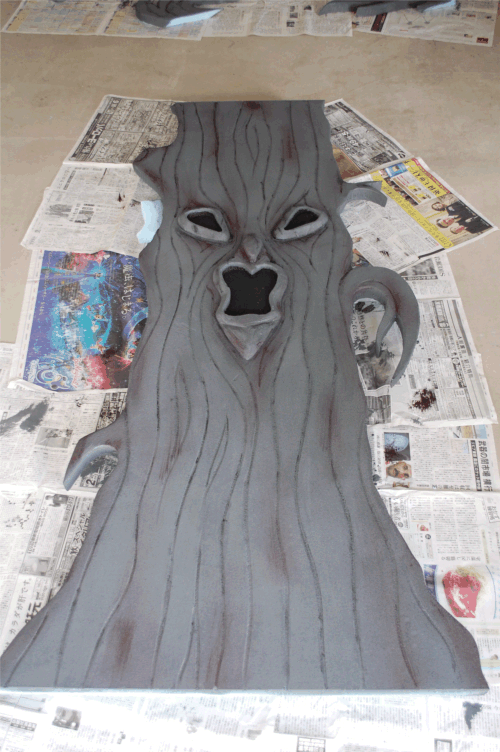
I painted the tree a dark gray first. You could stop there and your tree will look great. You could also use flat black, but I think the gray looks better. If you want to add more depth and feel to your tree, try shading it a bit as you see below. I added some black to the grooves I made for the tree grain. That gives them more depth. I also brushed the sides with black to make them appear to be further back and that makes the tree look more round. For any branch crossing or where they come out, I shaded with a little black paint. I added a little back around the face parts as well. I also brushed on some dark brown in sections just to add another color. For the inside of the mouth and eye, I just painted them black so it looks more like holes in the trees. It also adds more depth to the over all project.
I find it’s best to do this while the first coat of gray paint is still wet. this way the colors and shades you are brushing on mix a little better and fade into the others.
Step 4: put it together and place it in a Halloween scene
One more time, here’s the scary tree prop all completed and I actually made 2 scary tree props :D
Good luck with your Halloween decorations and I hope you party or holiday is a success!

October 4th, 2011 at 5:30 am
[…] pieces. Check out the next thread for how to make the cemetery fence posts. You can also add a spooky tree prop to your display as […]
October 5th, 2011 at 4:18 am
[…] hope your display turns out fabulous! If you want to make a spooky tree or need info on making the actual fence part, see the previous […]
October 8th, 2011 at 8:35 am
[…] more spookiness, try adding a spooky Halloween tree or rot iron fence to set up just in front of this old haunted shack scene […]
August 22nd, 2012 at 11:55 pm
Love the tree. How did you attach the two pieces together for display??
August 26th, 2012 at 12:21 pm
I’m glad you like the trees. I think I just used two small pieces of wood behind the top and bottom piece and then used duct tape to keep them together. It held for the entire Halloween party.
August 29th, 2012 at 12:31 am
Thanks. How tall was the bottom piece… Did you use the entire 4×8 sheet?
August 29th, 2012 at 12:48 am
The pieces are metric here 90cmx180cm (height 5’10”) and I used the entire height for the base. All in all the trees ended up being about 6’6″. For the branches section, I had them hang down. You can see that the center is cut out so the top portion is only about 8″. If they hang down it lowers the center of gravity for the top piece and may keep it in place better.
June 25th, 2013 at 4:42 am
Love the idea of the foam board! What type of paint did you use — interior latex or craft paint, etc?
Thanks!
June 26th, 2013 at 9:02 am
Melissa – If you can get a hold of some of this stuff (foam boards) I think you’ll love it. It’s easy to work with and light. It’s great for anything indoor, but not so good for large outdoor props. It blows over and snaps too easily in the wind.
I believe you can use a latex paint. I’ve never tried so I don’t know how it will turn out. I used plain water-based house paint. That works well to get down into the small crevices and keeps the surface layer texture.
The only thing you can’t use (that I know of) is aerosol paints, like spray paint. The aerosol eats the foam.
I hope your project turns out fabulous!
September 23rd, 2013 at 12:23 pm
This was exactly what I was looking for! Thank you so much for publishing this. We’re having a disney villains party this halloween and I have been looking for a way to make some spooky trees. The props are way too expensive for the size I wanted the trees to be and just making a construstion paper tree wasn’t quti the wow factor I was looking for. Thanks again! :D
September 23rd, 2013 at 1:59 pm
Jamie – Great! I’m glad this will work for you. If you have any questions, please let me know, and please send in a picture of your trees when you are done. I’d love to see what you end up making.
September 24th, 2013 at 2:43 pm
One other question…how did you get the extra branches (3d effect) attached. Did you just glue them? I thought they might just fall off that way so I didn’t know if you actually made a hole in the tree and pushed the branch through for more support.
My trees are all carved out…by the way, a jigsaw works GREAT for carving the foam. They look AWESOME. I’m so excited.
September 25th, 2013 at 1:16 am
I’m glad to hear that the trees are looking good. Could you tell me how many trees you made and roughly how much it cost you to make it all?
Jigsaw, you say? I would have thought it would be too strong and tear at the foam. But, I’ll give it a try. I’m all done for this year’s props, but I’ll test it out anyway. Thanks for the feedback.
3D pieces: I just used small thin nails to pin the extra pieces on. That way you can remove them without much damage to the prop. I wasn’t so sure that I liked them, so I didn’t glue them on. The second year I used these trees, I didn’t use the 3D pieces. However, you could glue them on with regular wood glue or use a hot-glue gun.
October 9th, 2013 at 3:52 pm
I have made 2 trees so far. Using the jigsaw does require a bit more sanding to smooth the edges, but it really worked great! My props are going to be outside (yikes). I think it will be ok, but I don’t think I’m going to be able to pull off the 3D effect and it sustain the wind at our house. I think the hardest piece to make was the nose!
October 23rd, 2013 at 2:00 pm
how thick is the foam board you used?
October 23rd, 2013 at 3:46 pm
It was 4cm thick, a little larger than 1.5″.
February 12th, 2014 at 4:48 pm
How did you get the tree to stand up on its own?
February 15th, 2014 at 5:52 am
I placed a stand behind the tree. There is a 1×1 rod screwed to a small platform. I (duct) taped the tree to the stand and placed a couple bricks on it. I holds them up for indoor use (no wind.)
September 23rd, 2014 at 4:01 pm
Simply brilliant-thanks
September 26th, 2014 at 12:57 pm
I’m glad you like the tutorial. If you make a tree or two, please send me a picture. I’d love to see how they turn out.
October 21st, 2014 at 10:37 pm
Great idea! How did you let the trees stand? Thanks!
October 22nd, 2014 at 1:35 am
I had a stand behind the trees. It was a 1×1 rod screwed to a flat wood base. Then I put a brick on the base and used duct tape to secure the tree to the stand. For other projects I have run screws through the foam boards and into a wood stand. That will make holes in the tree but you can just paint them black or fill them later with some paper and paint it gray again.
October 14th, 2015 at 6:27 pm
How did you put the top and bottom together?
October 14th, 2015 at 6:34 pm
sorry…just saw at the top
January 14th, 2016 at 3:03 am
Great job! I don’t seem to be able to find your tree template though.
January 24th, 2016 at 12:48 pm
Lizzy – The template drawing is the second picture with a simple tree outline drawn on paper. It’s not really meant to be a template you can transfer directly on to something, but more so, posted here to give you an idea. You could use it as is, but I’d suggest just referencing it. Then, draw your design directly on to the boards you are using.
Good luck with your project!